
Of all the ways to sharpen knives at home, using a sharpening stone can be the most intimidating. However, with care and use, you’ll find using one makes for some pleasant time in the kitchen. Knowing how to use a sharpening stone is a worthy skill to learn, and can ensure that your knife blades are always at their best.
Sharpening Stone Pros and Cons
Pros
- Stones can be used for both Western- and Asian-style knives. (Learn more about different types of kitchen knives.)
- Stones can also be used on paring knives, meat cleavers, kitchen shears, or even gardening tools.
- No other sharpener can hone and sharpen such a varied amount of knives.
Cons and Considerations
- You’re in control—with no guides to hold the blade, the angle at which you hold the knife will determine the grind.
- Sharpening stones take time to create a newly sharpened edge—it'll take several minutes, instead of a few quick passes through an electric sharpener.
Types of Sharpening Stones
Oilstones and waterstones.
Manufactures recommend soaking these in either oil or water before sharpening. Some say the oil or water helps to hold some of the grit in suspension during sharpening, but others say that both create a paste that clogs the open pores of the stone (rendering them less effective).
Whetstones.
In our opinion, we think the best option is a whetstone. Despite the sound of the name, the term “whet” means “to sharpen,” and no oil or water is necessary to use with this stone. Whetstones, like other sharpening stones, usually feature two sides with separate grit: one coarse, and the other fine. It’s important to know that you’re removing metal with each pass of the knife, so using the correct side for the job is a must.
How to Use a Whetstone

Step 1: Secure stone on countertop
Place rubberized shelf liner or damp paper towels under whetstone to make sure it stays in place (whetstone should be coarse side up).

Step 2: Sharpen first side
Face knife away from you and place handle end on whetstone at the angle of your blade (typically 15-degree angle for Asian-style knives and 20-degree angle for Western-style knives). Place other hand in the middle of the flat side of the blade, keeping your fingers flat and away from the sharp edge. Draw blade down the stone in a wide, circular manner, holding the blade at a constant angle until the tip of the knife runs off the other edge. Repeat several times, depending on dullness of blade.

Step 3: Check sharpness of first side
To check if the first side is sharpened, carefully run your thumb perpendicular to the edge of the blade–when you can feel the burr from handle to tip, that side is sharp enough. (Safety tip: Do not run your finger parallel to the blade.)

Step 4: Sharpen second side
Switch knife over and repeat the sharpening process in the opposite direction.

Step 5: Repeat technique on fine side
Turn whetstone over to fine side and repeat process on both sides of knife until blade is sharp.
Whetstone Pro Tips
- It’s important that the stone stays in one place. You can place it on a folded towel or a piece of rubberized shelf liner for stability. You can also go out to your garage and use a vice to hold the stone—simply use anything to hold it in place.
- How to hold your blade at the correct angle? One way to find out is by holding your knife perpendicular to the stone: This is a 90-degree angle.

Now cut that angle in half (that’s 45 degrees):

And half again (which is 22.5 degrees):

Now just drop it a smidge more to approach the angle of your blade (typically 15 degrees for Asian-style knives, or 20 degrees for Western-style knives).

- You can also buy blade guides. They attach to the back end of the blade, and these are often knife and angle specific.
- Another trick: Place two taped, stacked coins on your stone. Two nickels creates roughly a 20-degree angle, or use two taped dimes for a 15-degree angle.
- Use the same amount of care for both sides of the blade. If you’re right-handed, when sharpening the first side, the blade should be at the left end of the stone with the remaining part of the blade cantilevering the stone.

When repeating this on the other side, usually this will feel strange as you’re not holding the knife handle with your dominant hand.

- Just be patient, take your time, and check the blade edge (being careful to run your thumb across the blade, not along it) with every 10 passes to see if the burr is gone.
- All knives are different. You’ll find that most manufactures will state on their website the preferred angles for their knives.
More from Cook's Illustrated

The Best Carbon-Steel Knives
Carbon-steel enthusiasts have long considered these knives sharper and more durable than stainless. But do they really perform better—and are they worth the upkeep?
Read Our Review
How to Sharpen Kitchen Knives
A sharp knife is a fast knife, and a dull knife is an accident waiting to happen.
Learn More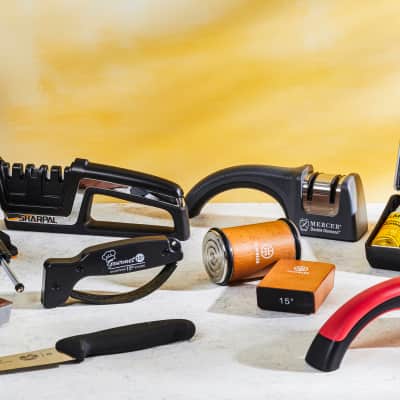
The Best Manual Knife Sharpeners
Keeping your kitchen blades sharp makes cooking easier, safer, and more enjoyable. The key is to get a good knife sharpener. We searched for a convenient and effective tool.
Read Our Review
The Best Nakiri
Beloved by Japanese home cooks, these traditional vegetable-cutting knives deserve a place in your kitchen.
Read Our Review
Kitchen Shears
A pair of scissors can be a sheer pleasure to use in the kitchen—if you get the right one.
Read Our Review
The Best Santoku Knives
With its petite build and curved tip, this friendly-looking Japanese blade is giving Western-style chef’s knives a run for their money. But does it offer something unique?
Read Our Review
The Best Heavy-Duty Cutting Boards
A good wood or bamboo cutting board can serve you well for years to come. Which model is best?
Read Our Review

Gyutou
In Europe, the chef's knife is a sturdy tool that can chop and slice anything. In Japan it's a thin, light precision instrument. What happens when East meets West?
Read Our Review
The Best Chef’s Knives for $75 or Less
Our longtime favorite chef's knife is sharp, capable, and comfortable to hold. But is it still the best?
Read Our Review