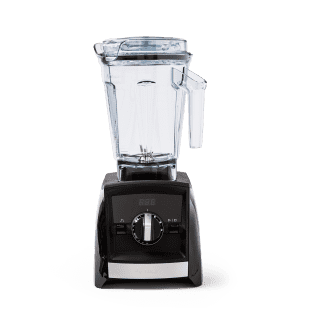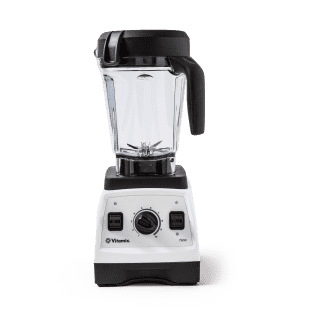
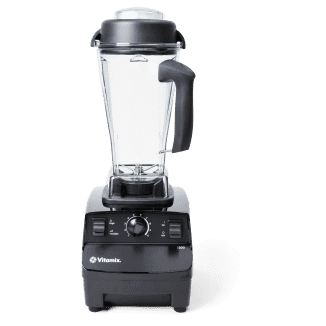


The best blenders are easy to use and moderately powerful and can make everything from smoothies to nut butter. Our longtime favorite is the Vitamix 5200. It’s pricey but durable; it consistently outperforms any blender on the market, and we love its simple, intuitive, no-frills controls. We also think the Vitamix A2500 is a great option. It performs nearly as well as our top choice and has a few handy preset functions that some users may appreciate.
At about half the cost of our top choice, the Breville Fresh & Furious is our favorite midpriced option. It blends foods just a tad less finely than our favorite, but otherwise, it does a great job with every task and is easy to use.
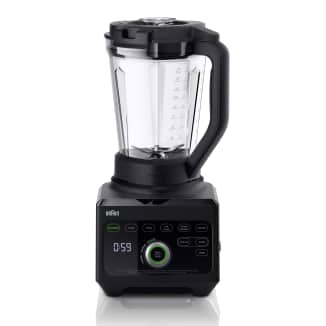
Finally, if you want to spend as little money as possible and still get a decent blender, the Ninja Professional Plus Blender with Auto-iQ might be the right choice for you. It struggled to make almond butter and can be a little finicky to use. But it makes solid smoothies, crushed ice, and mayo, and it’s relatively quiet.
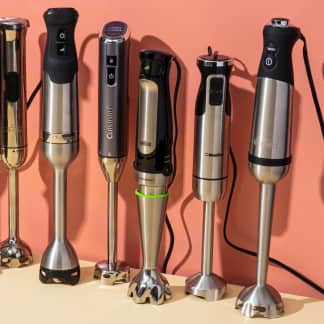
We’ve also reviewed immersion blenders, which are great for letting you blend foods like soup in the vessels you’ve used to cook them; personal blenders, which are essentially small-scale blenders that excel at making smoothies, milkshakes, or dressing for one or two people; and portable blenders, which are rechargeable models that let you make smoothies on the go.

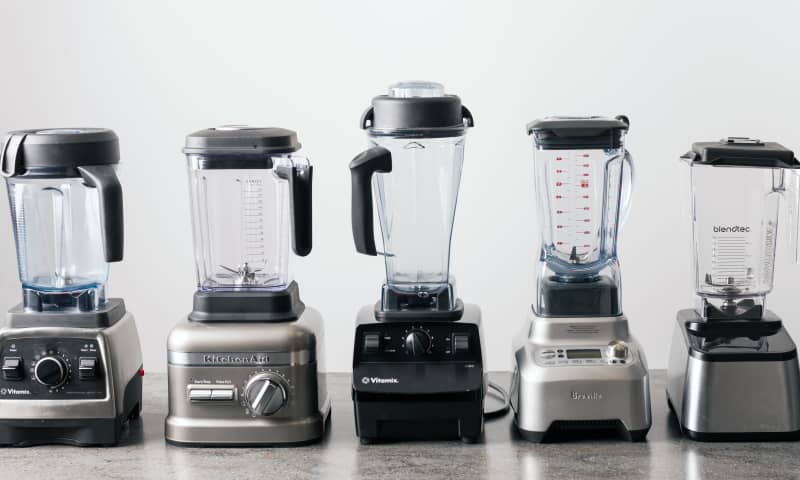
A good blender makes it easy to whip up smoothies, milkshakes, frozen drinks, sauces, dips, dressings, and even nut butters with the push of a button. We’ve tested dozens of models over the last three decades, from the least to the most expensive and in every size, in order to find the best blenders on the market. Here’s what we’ve learned.

What Size Blender Should I Get?
Most blenders have a capacity of 8 cups, but we’ve found that blenders that hold slightly less, down to 6 cups, can still accommodate pretty much any recipe. Blenders that hold less than 6 cups aren’t necessarily bad; you might just need a few more batches to puree or liquefy a full recipe’s worth of soup or to make margaritas for a crowd. Because they’re smaller, they often cost less and can be useful if you’re on a budget, have limited storage space, or only make recipes intended for one or two people.
Are Expensive Blenders Worth the Money?
Yes, for the most part.
While blenders at every price point can have flaws, in our experience, blenders that cost less than $100 are more likely to have functional limitations. We have yet to find a lower-priced blender that can do every job we expect of a top-notch blender—one might be able to make a decent smoothie, for example, but fail to make mayonnaise or crush ice evenly. Cheaper blenders often have less powerful motors, so they can’t always perform heavy-duty tasks such as grinding almond butter and might blend tough or fibrous ingredients less finely than more expensive, higher-powered blenders. You might also need to stop the machine and scrape down ingredients more often to get them back in contact with the blender’s blades.
Less expensive blenders are more likely to have smaller capacities (4 to 6 cups instead of the standard 8) and are often noisier, too, running well over 100 decibels at their peaks—a volume that can make them as loud as the average chainsaw. And they come with shorter warranties lasting one to three years, so you have less protection for the (admittedly smaller) investment you make.
Spending more than $100 on a blender gets you a few things. For one thing, more power. More expensive machines usually have more powerful motors, so they can more easily grind nuts or tough vegetables. They also make finer-textured smoothies and purees than machines with lower power. (That said, we’ve found that while power is useful up to a point, it’s far from the only factor determining perfect performance, so don’t assume that getting the most expensive blender with the highest power rating will guarantee satisfaction.)
More expensive blenders tend to be quieter and more durable than less expensive options. And finally, the more you spend, the longer your investment is likely to be protected, with warranties of at least seven years coming standard for the most expensive models.
If you’re only an occasional blender user who just wants a decent smoothie or margarita from time to time, you can get by with a $100 blender. But if you can afford to spend a bit more, you can get a much nicer blender with better appliance performance and longevity and less noise.
What to Look For
- A Powerful Motor: The power of a blender’s motor is important—up to a point. We’ve found that a blender needs a certain amount of power to perform the toughest tasks, blending tough, fibrous kale into smoothies or grinding dense almonds into butter. The more powerful the motor, the finer and smoother the purees, sauces, and dips it generally produces as well. But motor power isn’t the sole factor in determining the texture of smoothies and other food made by different blenders; in fact, above a certain power rating, you probably won’t even be able to detect real differences in how finely your food is processed. (We couldn’t.) It’s also important to note that the stated wattage on any blender packaging doesn’t necessarily represent the power you get during use. Most manufacturers advertise the power of a blender’s motor in either watts or horsepower (1 horsepower = 746 watts). The actual amount of power that a blender’s blades impart to food depends on a number of factors, including the design of the appliance, how it’s used, and what it’s blending, but we have found that as a rough guideline, the higher the advertised wattage, the more effective the blender does in fact seem to be.
- Tall, Narrow Jars: In our experience, the shape of the blender jar matters just as much as motor power. As blender blades turn, food is drawn to the bottom of the jar, chopped, and spun upward again, moving in a vortex that circulates ingredients until they reach the precise texture you want. In shorter, broader jars, the vortexes were chaotic; contents ricocheted off the sides and smashed up against the lids as if a fire hose were loose inside. The result: frothier, more aerated smoothies and dips. (This isn’t necessarily bad, but it’s not ideal either.) Blenders with taller, narrower jars that had a diameter of about 4.5 inches across at the middle, such as our favorite, kept food more contained toward the bottom of the jar, where it combined readily without incorporating extra air. Smoothies, dips, and soups came out creamy and smooth but not airy, and we didn’t have to scrape down the jar as much as with blenders that had wider jars. There are two small downsides to these taller, narrower jars, though: They generally increase the entire height of the blender a lot more than shorter, wider models, so the whole unit won’t fit under a standard 18-inch-tall cabinet. They’re also slightly harder to scrape food out of.

- A True Range of Speeds: Blenders have different speed settings, but although most blenders can do high speeds without a problem, comparatively few models are capable of mustering a real low speed—most blenders just go from fast to faster. Low speed is important for allowing ingredients to thoroughly combine without excessive splattering, especially when working with small amounts of food, as when making mayonnaise. If a blender’s low speed is too high, ingredients will be flung onto the walls of the jar and won’t fully mix. If you never make mayo or other small-volume recipes, it might be fine if your blender lacks a low speed. But the best blenders should be able to do slow, fast, and everything in between.
- Simple, Intuitive Controls: We prefer models that have simple, clearly labeled settings—off/on, a dial or buttons to adjust speed, and a pulse button are pretty much all you need.
- A Reasonably Quiet Motor: Blenders are loud—many of the models we’ve tested can actually compete with a chainsaw in noise output. While it’s impossible to find a blender that’s really quiet, we prefer models that kept noise levels under 100 decibels.
Nice to Have
- A Tamper: This long baton-like tool comes with most mid-range and high-end blenders and is helpful for handling cavitation. Cavitation is a situation in which an air pocket forms above the blades during blending—typically when blending thicker foods such as hummus or almond butter. When your blender gets stuck, you need to push ingredients back toward the blade, bursting the air bubble. You can use a spatula to do this, but a tamper is more useful, as you don’t need to turn the blender off and remove the lid to use it—it can be inserted through the hole in the blender lid while the blender is running, and it’s designed to be too short to hit the blades. This gets things moving and keeps the motor from overheating.
What to Avoid
- Underpowered Blenders: Blenders with stated power ratings of less than 750 watts often struggled to perform tougher tasks such as making nut butters; they also made coarser-textured smoothies and purees.

- Advanced Features (Ice Cream, Soup, Juice): Some high-end blenders come with the purported ability to make ice cream, heat soup, or even juice produce. Overall, we’ve been unimpressed with the blenders’ performance on these tasks, especially considering that they can add a few hundred dollars to a blender’s price. Ice cream made according to the blenders’ instructions was thin and icy. (You can make ice cream using a blender if you follow our no-churn ice cream recipe, but we use a fairly different technique.) Juice was fussy to make, requiring a strainer; even after we strained the resulting juice, it was silt-y or watery. And only one blender got soup hot enough to eat—after we ran it through two cycles. Save your money and stick to the simple functions.
- Fancy Displays: The LCD touch screen on one blender wasn’t responsive enough to be a practical upgrade. Plus, it scrolled annoying messages to us while we were blending, including ad-like notes directing us to the manufacturer’s website. We’d rather not be told “Be Healthy!” while making a batch of margaritas or “Tweet this!” first thing in the morning. This blender also offered a cavitation warning, which we found unnecessary. When an air pocket forms, you don’t need the machine to tell you; you can hear it, as the blades start whirring faster and sound more high-pitched, and see it, as ingredients stop moving.

Other Considerations
- Presets: Many of the models we tested included preset buttons; the most common ones were for smoothies, crushed ice, and cleaning. These buttons make certain tasks more hands-off, so you can start your blender and walk away, knowing it will stop when the cycle is done. If you’re a multitasker and want the most hands-off experience possible, presets might be worth it for you, but we don’t require them in a great blender. A smoothie takes only about 60 seconds to blend, and crushing ice takes just a few pulses, so the luxury of walking away while the blender works seemed a bit overstated to us. As for the self-cleaning features, you add soap and water and then activate the cleaning preset, which typically runs for a minute on high speed. While we did find this to be a great way to clean the blades, you don’t need a preset to do this. And with or without a dedicated button, this method doesn’t clean the lid or the top of the jar well, so you’ll still have to wash them separately.
- Glass versus Plastic Jars: Plastic blender jars are prone to retaining odors, but they’re nearly ubiquitous at this point and hard to avoid. A few blenders come with glass jars, or you can buy them separately. While these glass jars don’t have the plastic jars’ odor retention problems, they still come with plastic lids that do. And they’re heavier to lift for pouring or cleaning as well.
- Blade Design: After evaluating dozens of blenders over the years, we’ve found that there is no one perfect blade design that ensures success. Many different blade factors can determine performance: the number and size of the blades, their wingspan and angle, their material and edge type (serrated or straight), and the way the blades fit inside their jars can all play roles in how well or poorly a model blends.
The Tests
- Make kale, pineapple, and orange juice smoothies in measured amount of time
- Make kale, pineapple, and orange juice smoothies according to each blender’s instructions
- Emulsify eggs and oil into mayonnaise
- Grind almonds into almond butter
- Crush ice
- Wash jar and parts by hand or in dishwasher 10 times, per manufacturer instructions
How We Rated
- Noise: We rated the blenders on how much noise they made during use.
- Smoothies: We evaluated the consistency of the smoothies made in each blender.
- Mayonnaise: We rated the blenders on how well they were able to make mayonnaise.
- Crushed Ice: We evaluated the blenders on how evenly and finely they crushed ice.
- Ease of Use: We rated the blenders on how easy they were to operate, store, maneuver, and clean.
- Almond Butter: We evaluated the blenders on how easily and how finely they were able to grind almond butter.