Three-Cheese Ravioli with Browned Butter–Pine Nut Sauce
With our supermalleable dough, you don't need a pasta machine—or the skills of an Italian grandmother—to make tender yet springy ravioli.

Gather Your Ingredients
Pasta DoughKey Equipment
Before You Begin
If using King Arthur All-Purpose Flour, increase the egg yolks to seven. To ensure the proper dough texture, weigh the flour. The longer the dough rests in step 2, the easier it will be to roll out. When rolling, don't add too much flour; it can cause excessive snapback. You can use a pasta machine if you prefer. If you don't have a pot that holds 6 quarts, cook the ravioli in two batches; toss the first batch with some sauce in a bowl, cover it with foil, and keep it warm in a 200-degree oven while the second batch cooks. The ravioli may also be served with our Quick Tomato Sauce.
Instructions
1.
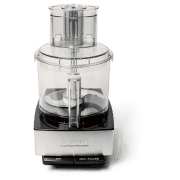
Make pasta dough: Process flour, eggs and yolks, and oil in food processor until mixture forms cohesive dough that feels soft and is barely tacky to touch, about 45 seconds. (Pinch dough between your fingers; if any dough sticks to your fingers, add up to ¼ cup extra flour, 1 tablespoon at a time. Process until flour is fully incorporated after each addition, 10 to 15 seconds, before retesting. If dough doesn't become cohesive, add up to 1 tablespoon water, 1 teaspoon at a time, until it just comes together; process 30 seconds longer.)
2.
Knead and let rest: Turn out dough onto dry counter and knead until smooth, 1 to 2 minutes. Shape dough into 6-inch-long cylinder. Wrap in plastic wrap and let rest at room temperature for at least 1 hour or up to 4 hours. Wipe processor bowl clean.
3.
Make filling: Process ricotta, fontina, Parmesan, egg, pepper, salt, and nutmeg in now-empty processor until smooth paste forms, 25 to 30 seconds, scraping down sides of bowl as needed. Transfer filling to medium bowl, cover with plastic, and refrigerate until needed.
4.
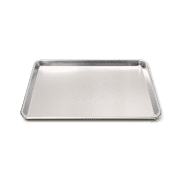
Roll dough into squares: Line rimmed baking sheet with parchment paper. Cut dough cylinder crosswise into 6 equal pieces. Working with 1 piece of dough at a time (keep remaining pieces covered), dust both sides with flour, place cut side down on clean counter, and press into 3-inch square. Using heavy rolling pin, roll into 6-inch square.
5.
Roll dough into sheets: Dust both sides of 1 dough square lightly with flour. Starting at center of square, roll dough away from you in 1 motion. Return rolling pin to center of dough and roll toward you in 1 motion. Repeat rolling steps until dough sticks to counter and measures roughly 12 inches long. Lightly dust both sides of dough with flour and continue to roll out dough until it measures roughly 20 inches long and 6 inches wide, frequently lifting dough to release it from counter. (If dough firmly sticks to counter and wrinkles when rolled out, carefully lift dough and dust counter lightly with flour.) Transfer dough sheet to prepared baking sheet and cover with plastic. Repeat rolling with remaining 5 dough squares and transfer to prepared sheet (2 dough sheets per layer; place parchment between layers). Keep dough covered with plastic.
6.
Deposit filling on dough: Line second baking sheet with parchment. Lay 1 dough sheet on clean counter with long side parallel to counter edge (keep others covered). Trim ends of dough with sharp knife so that corners are square and dough is 18 inches long. Brush bottom half of dough with egg white. Starting 1½ inches from left edge of dough and 1 inch from bottom, deposit 1 tablespoon filling. Repeat placing 1-tablespoon mounds of filling, spaced 1½ inches apart, 1 inch from bottom edge of dough. You should be able to fit 6 mounds of filling on 1 dough sheet.
7.
Shape: Cut dough sheet at center points between mounds of filling, separating it into 6 equal pieces. Working with 1 piece at a time, lift top edge of dough over filling and extend it so that it lines up with bottom edge. Keeping top edge of dough suspended over filling with your thumbs, use your fingers to press layers together, working around each mound of filling from back to front, pressing out as much air as possible before sealing completely.
8.
Trim: Once all edges are sealed, use sharp knife or fluted pastry wheel to cut excess dough from around filling, leaving ¼- to ½-inch border around each mound (it's not necessary to cut folded edge of ravioli, but you may do so, if desired). (Dough scraps can be frozen and added to soup.) Transfer ravioli to prepared baking sheet. Refrigerate until ready to cook. Repeat shaping process with remaining dough and remaining filling.
9.
Boil: Bring 6 quarts water to boil in large pot. Add ravioli and 1 tablespoon salt. Cook, maintaining gentle boil, until ravioli are just tender, about 13 minutes. (To test, pull 1 ravioli from pot, trim off corner without cutting into filling, and taste. Return ravioli to pot if not yet tender.) Drain well.
10.
Make sauce; serve: While ravioli cook, melt butter in 10-inch skillet over medium-high heat. Continue to cook, swirling skillet constantly, until butter is dark golden brown and has nutty aroma, 1 to 3 minutes longer. Off heat, add pine nuts, parsley, and salt. Using spider skimmer or slotted spoon, transfer ravioli to warmed bowls or plates; top with sauce. Serve immediately, passing extra Parmesan separately.


0 Comments
Posting GuidelinesFROM OUR TV SPONSORS
We are thankful to the sponsors who make it possible for us to bring you the America's Test Kitchen TV series on public television. Read more about why we have sponsors.