Braided Round Challah
Ritual and muscle memory have carried this soft, rich Jewish loaf through generations. A change in technique made the dough perfect for novice bread bakers.

Gather Your Ingredients
Flour PasteKey Equipment
Before You Begin
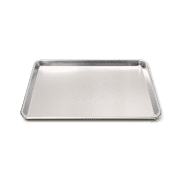
We strongly recommend weighing the flour for the dough. This dough will feel firmer and drier than most bread doughs, which makes it easy to braid. Some friction is necessary for the rolling of the ropes and the braiding of the loaf, so resist the urge to dust your counter with flour. Bake this loaf on two nested baking sheets to keep the bottom of the loaf from getting too dark.
Instructions
1.
For the flour paste: Whisk water and flour in bowl until no lumps remain. Microwave, whisking every 20 seconds, until mixture thickens to stiff, smooth, pudding-like consistency that forms mound when dropped from end of whisk into bowl, 40 to 80 seconds.
2.
For the dough: In bowl of stand mixer, whisk flour paste, egg and yolks, water, and oil until well combined. Add flour and yeast. Fit mixer with dough hook and mix on low speed until all flour is moistened, 3 to 4 minutes. Let stand for 20 minutes.
3.
Add sugar and salt and mix on medium speed for 9 minutes (dough will be quite firm and dry). Transfer dough to counter and lightly spray now-empty mixer bowl with oil spray. Knead dough briefly to form ball and return it to prepared bowl. Lightly spray dough with oil spray and cover bowl with plastic wrap. Let dough rise until about doubled in volume, about 1½ hours.
4.
Line rimmed baking sheet with parchment paper and nest in second rimmed baking sheet. Transfer dough to counter and press into 8-inch square, expelling as much air as possible. Cut dough in half lengthwise to form 2 rectangles. Cut each rectangle in half lengthwise to form 4 equal strips of dough. Roll 1 strip of dough into 16-inch rope. Continue rolling, tapering ends, until rope is 18 inches long. Repeat with remaining dough strips.
5.
Arrange prepared sheets so long side is parallel to edge of counter. Place first rope just to left of center of sheets so that its ends hang off rim of sheets. Place second rope perpendicular to first rope, just above center of sheets. Place third rope across second rope, just right of center. (Ropes 1 and 3 should be parallel to each other.) Place final rope below rope 2, making sure that it is on top of rope 3 and beneath rope
6.
Adjust ropes to create 1-inch square at center of sheets. (Photo 1)
7.
Pick up 2 ropes closest to you and loosely cross them right over left. Rotate sheets 90 degrees counterclockwise. (Photo 2) Repeat crossing ropes and turning sheets 3 times. Rearrange ends of all ropes so they point at corners of sheets. Rotate sheets until any corner points toward you.
8.
Pick up 2 ropes closest to you and loosely cross them left over right. (Photo 3) Rotate sheets 90 degrees counterclockwise. Repeat crossing ropes and turning sheets 3 times. Rearrange ends of ropes so they point at sides of sheets. Rotate sheets so long side is parallel to edge of counter.
9.
Pinch 2 ends closest to you together. Rotate sheets 90 degrees and repeat until all ends are pinched together. (Photo 4) Tuck all pinched ends and outer loops under round. (Photo 5) Cover loosely with plastic and let rise until dough does not spring back fully when gently pressed with your knuckle, about 3 hours.
10.
For the egg wash: Thirty minutes before baking, adjust oven rack to middle position and heat oven to 350 degrees. Whisk together egg and salt. Brush loaf with egg wash and sprinkle with sesame seeds, if using. Bake until loaf is deep golden brown and registers at least 195 degrees, 35 to 40 minutes. Let cool on sheets for 20 minutes. Transfer loaf to wire rack and let cool completely before slicing, about 2 hours.


0 Comments
Posting GuidelinesFROM OUR TV SPONSORS
We are thankful to the sponsors who make it possible for us to bring you the America's Test Kitchen TV series on public television. Read more about why we have sponsors.