Cinnamon and Walnut Sweet Bread—Babka

Gather Your Ingredients
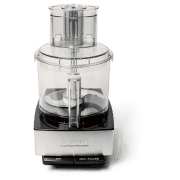
DoughKey Equipment
Before You Begin
Because of all the butter in this dough, we don’t recommend kneading this by hand or in a food processor. After mixing for the final 15 minutes, the dough should be very soft and slightly sticky, but not wet. You will know that you have added enough flour in step 2 if, when you touch the finished dough, it pulls away from your fingers. This is a rustic bread, so do not worry about slicing the raw dough in step 6 into perfect rounds or even if you are a few rounds short. This recipe was published in our cookbook The Best International Recipe.
Instructions
1.
For the dough: In a medium bowl, whisk together 4 1/2 cups of the flour and the yeast; set aside. In the bowl of a standing mixer, whisk together the sour cream, granulated sugar, eggs, water, vanilla, and salt. Add the flour mixture (do not stir in) and, using the dough hook, knead the mixture on low speed until the ingredients are evenly combined, about 3 minutes. Increase the mixer speed to medium-low and continue to knead until the dough becomes smooth, about 8 minutes longer, stopping to scrape down the sides of the bowl occasionally. (The dough will be very wet.)
2.
With the mixer running on medium-low, slowly add the butter, 1 piece at a time, waiting about 15 seconds between additions. After the butter has been added, scrape down the sides of the bowl and continue to knead the dough on medium-low until the dough forms a very soft ball, about 15 minutes longer, adding the remaining 1 cup (5 ounces; 142 grams) flour, 2 tablespoons at a time, until the dough is no longer wet and it clears the sides of the bowl but stick to the bottom of the bowl. (You may not need all the flour; the dough should be very soft and sticky.)
3.
Scrape the dough into a large, lightly oiled bowl. Cover with plastic wrap and refrigerate for 10 to 24 hours. (Because of the high butter content, the dough will rise only slightly.)
4.
For the filling: Mix all of the ingredients together; set aside. Spray two 9-inch loaf pans with vegetable oil spray, then line with overhanging strips of parchment paper following the illustrations below. Spray the parchment paper with vegetable oil spray and set aside.
5.
Turn the cold dough onto a lightly floured work surface. Use a rolling pin to roll the dough into an 18 by 24-inch rectangle, about 1/16-inch thick, with the long side facing you. Following the illustrations below, sprinkle the filling evenly over the dough. Roll into a long, taut cylinder. Pinch the seam closed to secure.
6.
Lightly dust the roll with flour and pat into a uniform, 24-inch-long cylinder. Using a serrated knife, slice the roll into 3/4-inch thick slices (you should have about 32 slices). Arrange the slices in 2 long rows in each of the prepared loaf pans (about 16 slices per pan). Loosely cover the pans with plastic wrap and let rise at room temperature until almost doubled in size, 2 to 2 1/2 hours.
7.
For the glaze and to bake: Adjust an oven rack to the lower-middle position and heat the oven to 450 degrees. Mix the granulated sugar and cinnamon together. In a separate bowl, beat the egg with the water. Brush the loaves gently with the egg mixture, then sprinkle with the cinnamon-sugar mixture. Place the loaf pans in the oven and reduce the temperature to 350 degrees. Bake the loaves until browned and an instant-read thermometer inserted into the side of the loaf reads 190 degrees, 50 to 60 minutes, rotating them halfway through the baking time. (If the tops of the loaves look like they are getting too dark, tent the pans loosely with foil.)
8.
Transfer the loaf pans to a wire rack and let cool for 15 minutes. Using the overhanging parchment as a grip, remove the babka from the loaf pans. Let the loaves cool completely on the rack before slicing and serving. (The cooled loaves can be wrapped tightly in plastic wrap and stored at room temperature for up to 3 days, or frozen for up to 1 month. If frozen, let thaw completely at room temperature, then refresh briefly in a 350-degree oven until lightly warmed before serving.)
Test Kitchen Techniques
Recommended Reading
More From America's Test Kitchen


0 Comments
Posting GuidelinesFROM OUR TV SPONSORS
We are thankful to the sponsors who make it possible for us to bring you the America's Test Kitchen TV series on public television. Read more about why we have sponsors.