Sourdough Starter
Making a starter requires time but very little effort. And once it’s established, it opens up a whole new universe of homemade breads with sourdough’s trademark tang.

Gather Your Ingredients
Key Equipment
Before You Begin
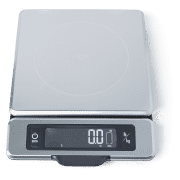
For the best results, weigh your ingredients and use organic flour (which is richer in microorganisms than conventional flour) and bottled or filtered water (which is free of the chlorine in tap water that can kill those essential microorganisms) to create the starter. Be sure to include white and either whole-wheat or rye flour in the bulk flour mixture; whole-grain flours are more nutritious than white flour and are more likely to contain the bacteria and yeast we want, making them ideal nourishment for the nascent culture. (Once the starter is mature, you maintain it with just white flour; nonorganic is fine.) Once the starter is ready for use, it can easily be scaled up to the necessary proportions. Note that the time frame of each step is approximate: How quickly your starter moves from one step to the next will depend on the flour you’re using to refresh it and how hospitable the environment is for yeast and bacteria activity. Let visual cues be your guide and use the day count as a reference. You'll need 2 small lidded containers, such as 4-ounce canning jars, and 1 larger lidded container, such as a 16-ounce canning jar. For more information on making a starter, be sure to read this article.
Instructions
1.
CREATE AND PROOF INITIAL STARTER: Create bulk batch of flour mixture by combining bread or all-purpose flour with whole-wheat or rye flour in sealable container (weighing ingredients will become vital later, but volume is fine here). Using spoon, mix 4 teaspoons (⅓ ounce; 10 grams) flour mixture and 2½ teaspoons (⅓ ounce; 10 grams) water in small jar. Cover with plastic wrap or loosely with lid and let sit at warm room temperature (70 to 80 degrees) for 1 to 3 days. Visual cue to move to the next step: Starter is bubbly, wet-looking (there might even be liquid pooled on top), and fragrant—even pungent.
2.
REFRESH STARTER ONCE DAILY: Stir starter well and transfer 2 teaspoons (1/3 ounce; 10 grams) to clean jar; reserve remaining starter as backup in original jar and store in refrigerator. Stir 4 teaspoons (⅓ ounce; 10 grams) flour mixture and 2½ teaspoons (⅓ ounce; 10 grams) water into starter mixture until no dry flour remains. Cover with plastic wrap or loosely with lid and let sit at warm room temperature for 24 hours. Repeat every 24 hours for 4 to 10 days. Visual cue to move to next step: Starter is bubbly and fragrant less than 12 hours after previous refreshment
3.
REFRESH STARTER TWICE DAILY: Refresh starter as before every 12 hours. At this stage, in addition to saving leftover starter as backup, you can collect generations of backup starter in a larger sealed jar; store it in the refrigerator to keep on hand for use in other nonbread applications such as pancakes, biscuits, and crackers. If at any point the starter activity slows down or stops altogether, return to refreshing the culture once daily. Cues that starter is mature and ready for baking: Starter doubles or triples in volume within 12 hours of being refreshed and smells yeasty/bready/yogurty.
4.
CHECK MATURITY/READINESS FOR BAKING: Conduct a “float test”: Place a blob of starter in a jar with water. If starter floats, it’s producing and retaining ample amounts of carbon dioxide, meaning the yeast population has increased sufficiently.
5.
STORE AND MAINTAIN MATURE STARTER: If your starter exhibits the signs of maturity and passes the float test, you can move it to the refrigerator. Measure out 1½ tablespoons (1 ounce; 28 grams) starter and transfer to clean bowl (save any leftover starter in refrigerator as backup culture). Stir 7 tablespoons (2 ounces; 57 grams) all-purpose flour and 1/4 cup (2 ounces; 57 grams) room-temperature (70 degrees) water into starter until no dry flour remains. Place mixture in jar, seal it well but loosely, and let sit at room temperature until it has about doubled in volume, 3 to 6 hours (use rubber band around container to mark the mixture’s starting volume). Once mixture has doubled, transfer jar to refrigerator. Repeat process every 7 to 14 days.


0 Comments
Posting GuidelinesFROM OUR TV SPONSORS
We are thankful to the sponsors who make it possible for us to bring you the America's Test Kitchen TV series on public television. Read more about why we have sponsors.